RowErgs | Page 2 | Concept2

RowErgs

Developing an Annual Training Calendar

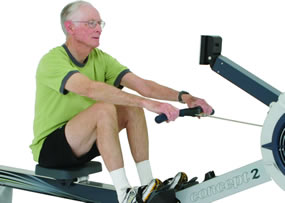
Rowing is a great complement to training for other sports. This section shows you how to develop an annual training calendar and provides workout suggestions that incorporate rowing for general cross-training as well as in training for a specific sport.

  1. Make a list of the sports you do throughout the year and define the “Active” (or competitive) season(s) for each.
  2. Define the “Training” season for each sport by backing up three months from the active season. This is when your major training should occur. If you know from experience that you need a longer or shorter training season, adjust accordingly.
  3. Define the “Groundwork” phase by backing up five months from the training season. This phase focuses on general condition and prep work, giving you a solid base on which to build your focused training.
  4. Define the rest of the year for each sport as “Recovery.”

Refer to the examples if you need help.

Single Sport, Multiple Season Training Calendar

If you have one sport with several distinct active seasons (for example, a major competition in the spring and another in the fall), your training calendar would look like this:

Month Phase Sport
January Training Running, rowing
February
March
April Active
May Recovery
June Training
July
August
September Active
October Recovery
November Groundwork
December

Single Sport, Single Season Training Calendar

If you are training for a single sport that has a single active/competitive season that extends from April to June, for example, your training calendar will look as follows:

Month Phase Activity
January Training Triathlon, golf, paddling
February
March
April Active
May
June
July Recovery
August Groundwork
September
October
November
December

Multiple Sport, Multiple Season Training Calendar

Following is an example of a multi-sport training calendar. This example includes a regatta season in the fall, Nordic ski races through the winter, and a marathon and shorter runs during late spring and summer. The active phases are spread out; the training, groundwork, and recovery phases overlap to become cross-training for each other, with rowing acting as the common thread.

Month Rowing Phase Running Phase Nordic Skiing Phase
January Recovery Groundwork Active
February Groundwork Training
March
April Recovery
May Active Groundwork
June
July Training
August Recovery
September Groundwork
October Active Training
November Recovery
December

Training for Each Phase

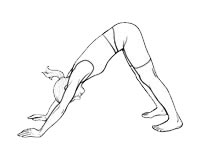
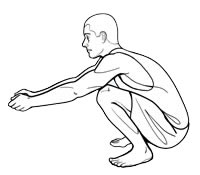
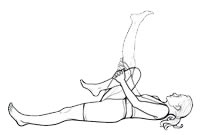
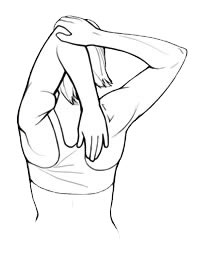
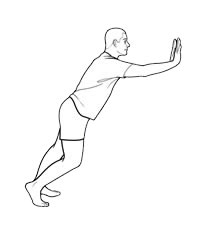
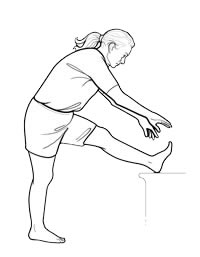
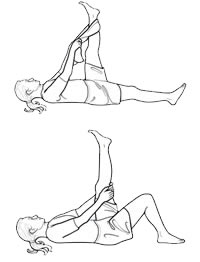
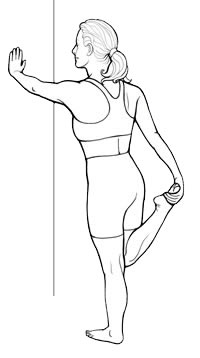
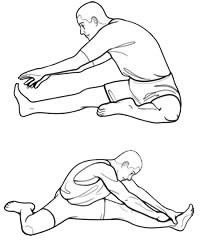
  • Groundwork—Emphasize longer, steadier work. The goal is to develop a good base of general cardio conditioning and adjust your muscles to the specific motions of your sport. Include plenty of stretching, flexibility, and strengthening exercises.
  • Training—Tailor your workouts for the distance and intensity of your upcoming events. You will need to train a bit at your race pace to develop a sense of pace for your competition. Include shorter, harder work to increase your intensity level, and longer, easier work to improve endurance.
  • Active—Keep sharp and rested during this phase, and recover between events. Increase your workload if your events are fewer and further apart.
  • Recovery—This phase is about variety, fun and whatever pace feels right. Incorporate lots of stretching. Keep in tune with your sport by doing a few steady state workouts at a comfortable pace.

Sample Workouts

Before trying these workouts, please read our liability disclaimer.

Try the following workouts to train for your sport:

  • 40 minute steady state row (or 10,000m) (Groundwork and Training).
  • 40 minutes of one minute hard, one minute easy (Groundwork and Training).
  • 1-2-3-4-3-2-1 minute pyramid with 30 seconds off between pieces (Training and Active).
  • Three minutes at 18 spm (strokes per minute), two minutes at 24 spm, one minute at 28 spm. Continue cycle for 30–60 minutes (Training and Active).

Workout frequency: 2–4 times per week during the recovery phase; 1–2 times per week during the Active phase.

Duration: 30–60 minutes. Shorter for intense, speed workouts; longer for steady state aerobic workouts.

Type and intensity: Vary this between steady state, anaerobic threshold work, intense intervals and racing pieces.

The Anaerobic Threshold

The anaerobic threshold (AT) is the exertion level between aerobic and anaerobic training. The AT is the point during exercise when your body must switch from aerobic to anaerobic metabolism. The AT is a useful measure for deciding exercise intensity for training and racing in endurance sports.

During aerobic metabolism, your body creates energy by burning carbohydrates and fats in the presence of oxygen and produces carbon dioxide and water as by-products (breathing and sweating). Most of our daily activities are fueled by aerobic metabolism.

Anaerobic metabolism kicks in when exercise intensity is greatly increased, and the aerobic system can no longer keep up with the body’s energy demand. This is the point at which we cross the AT. During anaerobic metabolism, the body burns stored sugars to supply the additional energy needed, and lactic acid is produced faster than it can be metabolized. Muscle pain, burning and fatigue make anaerobic energy expenditure difficult to sustain for longer than a few minutes.

The fitter you are, the longer you can fuel your body with the aerobic system before the anaerobic system needs to take over. You can improve your aerobic efficiency—and thus raise your AT—by doing high-quality aerobic work at a level just below your current AT. Monitoring your heart rate and finding your Training Heart Rate Range (THRR) will help you determine what your current AT is.

Workouts to Raise the AT

Interval workouts are effective for raising the AT. For the best results, vary your workouts between aerobic work (where duration takes priority over high intensity), and higher-intensity intervals (where you will be just under or at your Maximum Heart Rate (MHR)). Aerobic work should comprise the largest percentage of your training. Here are a few interval workouts to try. We recommend long sub-maximal intervals, with roughly equal rest. As always, warm-up well before starting your piece:

  • 5 x 750 meters with 3 minutes rest
  • 4 x 1000 meters with 3–4 minutes rest
  • 4–5 x 5 minutes with 4 minutes rest
  • 5 x 4 minutes with 4 minutes rest

Using the Force Curve

Force Curve on Performance MonitorThe Force Curve graphically represents how you apply force (or power) during the rowing stroke, indicating how your total force varies as you use your legs, back and arms during the drive:

  • The smoother the curve, the smoother the application of force.
  • The larger the area under the curve, the greater the amount of force applied.

PM3s, PM4s and PM5s all include the Force Curve function (during your row, press Change Display or Display until you see it, or press the second button down on the right). Watching the force curve during your workouts can help reinforce good rowing technique.

Examples

The Ideal Curve Good Force Curve

Applying solid effort through the stroke results in this curve.

Peaks and Valleys Mountainous Force Curve

If your force curve resembles a distant mountain range, you need to work on making your transition from legs to back to arms smoother. Multiple peaks are good for hiking…but not for a force curve.

Double Diamond
Shifted Left Force Curve

Exploding at the catch—applying great force at the beginning of the drive—results in a sharp curve and steep drop; the whole curve is actually shifted to the left of the PM screen. This illustrates how varying the timing and emphasis of your legs, back and arms during the drive changes how and when force is applied.

Learning More

The internet can be a great resource for Force Curve discussions.

See Valery Kleshnev’s brief discussion of force curve in the Rowing Biomechanics Newsletter, December 2001.

How to Row Harder

The Concept2 Indoor Rower does not force you to row at a certain speed or intensity. At any damper setting—and at any time during a workout—you can increase or relax your effort, rowing as hard or as easy as you want. The key to increasing intensity is knowing how to monitor it, and knowing how and when to apply power.

Monitoring Intensity

Monitoring intensity is a key job of the Performance Monitor (PM). The PM displays intensity in pace, Calories and watts. Pace is expressed as time per 500 meters. When monitoring pace, the numbers will decrease the faster you go: a pace of 2:00 means that it takes you two minutes to complete 500 meters, slower than someone completing 500 meters in one minute 48 seconds (a 1:48 pace), and faster than someone rowing a 2:08 pace. If you watch watts or Calories, the opposite is true: the numbers will increase—you’ll produce more watts, burn more Calories—as you increase your intensity.

Stroke Rate

Stroke rate is the number of strokes you take per minute, or spm. The PM displays this number in the upper right corner. Rowing harder does not necessarily mean your stroke rate is faster. As you increase your intensity, try to keep your spm between 24 and 30 for most workouts, and 36 or below when racing. Read on to learn how.

Applying Power and Relaxing the Recovery

The key to keeping your stroke rate reasonable while increasing intensity is applying good power at the beginning of the stroke (the drive) and keeping your recovery under control. During the drive, be efficient with your power by engaging your legs at the start, then swinging the back, and then following through with your arms. On the recovery, don’t rush as you slide toward the handle for your next stroke. It’s called “recovery” for a reason! Overall, your drive-recovery ratio should be 1:2. In other words, your recovery should take twice as long as your drive. Review our Technique video if needed, and be sure to check out our video on Rowing with Greater Intensity.

How to Start

Before trying these examples, please read our liability disclaimer.

A good way to start rowing harder is to incorporate short bursts of power into an easier workout. Here are some examples:

  • Power 10s: 10 strokes at a higher intensity, spread out during a longer row.
  • Accelerations: 10–15 strokes where you gradually build your intensity from easy to hard.
  • Pickups: During a long piece, row the first 20 strokes (or 45 seconds) of each 500m at a higher intensity.
  • Alternative: Row 20 seconds hard, 1:40 (one minute, 40 seconds) easy. When rowing hard, try a pace that is five seconds faster per 500m.

First Workouts

Once you’re comfortable with rowing technique, gradually begin increasing the duration and intensity of your workouts. Here are workouts to try. We recommend doing them in the order listed.

Before trying these workouts, please read our liability disclaimer.

Workout 1

Start with a row of 3–5 minutes. Then take a break to stretch and walk around. If you feel good, do up to four of these short intervals of rowing.

If you want more coaching and motivation, this episode of the Concept2 Workout Podcast will coach you through the above workout with more detail about body position, the parts of the stroke, stroke rate and applying power. You'll learn how to use different features of the Performance Monitor (PM), and gain a better understanding of the relationship between your work and what you see on the PM screen—effectively an introductory lesson on how to use the PM as your training partner.

This episode of As the Flywheel Spins: The Concept2 Workout Podcast will guide you through the workout, giving you more coaching and guidance as you make your way through this workout.

Workout 2

Begin experimenting with stroke rate and power output. On the Performance Monitor, stroke rate is displayed in the upper right corner; power output appears in the center of the monitor and can be displayed in watts, calories or pace (time per 500m). Here are the workout details:

  • 3 minutes at 20 strokes per minute (spm), comfortable effort; 1 minute rest.
  • 3 minutes at 22 spm, harder effort; 1 minute rest.
  • 3 minutes at 24 spm, comfortable effort; 1 minute rest.
  • 3 minutes at 24 spm, harder effort; 1 minute rest.
  • 10 minutes steady state rowing at your choice of power and stroke rate. Make note of what pace you settle on, because you will use it in your next workout.

This episode of As the Flywheel Spins: The Concept2 Workout Podcast will guide you through the workout, giving you more coaching and guidance as you make your way through this workout.

Workout 3

This workout introduces longer rowing with stroke rate variation. Here are the details:

  • Do four 5 minute pieces, varying the stroke rate as noted below. Try to row at a pace that is a few seconds faster than your 10 minute pace from Workout 2.
    • 20 spm for the first 2 minutes
    • 22 spm for the next 2 minutes
    • 24 spm for the last minute
    • Rest: row very easily for 2 minutes before starting the next 5 minute piece.

This episode of As the Flywheel Spins: The Concept2 Workout Podcast will guide you through the workout, giving you more coaching and guidance as you make your way through this workout.

Workout 4

This workout focuses on longer, steady rowing.

  • Do two 10 minute pieces with 3 minutes rest in between. Aim for a pace that’s between the paces you rowed in Workouts 2 and 3. Your stroke rate should be between 22 and 26.

Workout 5

This workout features short intervals for variety. This is the workout to see how fast a pace you can achieve.

  • Row 1 minute hard, 1 minute easy for a total of 20 minutes. Watch the central display for your pace. Aim for a stroke rate of 24–28. Record your pace after the workout using the recall/memory function on the Performance Monitor.

Benchmark Piece

Once you complete Workout 5, do a benchmark piece of 30 minutes nonstop. Record your total meters, and repeat this workout every few weeks to see how you are progressing.

Next Steps

Now that you’ve completed the first few workouts, begin building an exercise plan that works for your schedule and goals. Visit our Workout of the Day page for ideas.

Damper Setting 101

Damper Setting is…

Setting the Indoor Rower Damper
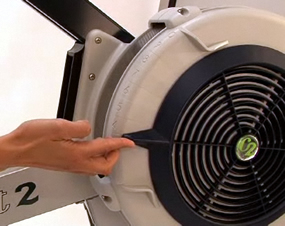
The damper is the lever on the side of the flywheel housing, or fan cage, that controls how much air flows into the cage. The fan cages on our later indoor rowers (Model C and later), are numbered so you can set the damper lever to a particular value from 1–10, indicating how much air is drawn into the cage on each stroke:

  • Higher damper settings allow more air into the flywheel housing. The more air, the more work it takes to spin the flywheel against the air. More air also slows the flywheel down faster on the recovery, requiring more work to accelerate it on the next stroke.
  • Lower damper settings allow less air into the flywheel housing, making it easier to spin the flywheel.

Damper setting is similar to bicycle gearing: it affects how rowing feels but does not directly affect the resistance. A lower damper setting on the indoor rower is comparable to easier gears on a bike.

Damper Setting is Not…

Many people confuse damper setting with intensity level or resistance. Instead, the intensity of your workout is controlled by how much you use your legs, back and arms to move the handle—in other words, how hard you pull. This is true regardless of where the damper lever is set: the harder you pull, the more resistance you will feel. Because our indoor rowers use wind resistance (which is generated by the spinning flywheel), the faster you get the wheel spinning, the more resistance there will be.

Think about rowing on the water. Regardless of whether you are rowing in a sleek racing shell, or in a big, slow row boat, you will need to increase your intensity and apply more force to make either boat go faster. The difference is in how it feels to make the different boats go fast. Making a sleek boat go fast requires you to apply your force more quickly. Making the slow boat go fast also requires more force, but the speed at which you apply the force will be slower over the course of the rowing stroke.

At a damper setting of 1–4, the indoor rower feels like a sleek racing shell; at the higher numbers, the indoor rower feels like a slow row boat. Regardless of the setting, you will need to increase your effort to increase your intensity.

Drag Factor: How True Effort is Calculated

You might be tempted to think that rowing on the highest setting will result in your best score. This is where the Performance Monitor comes in.

Between each stroke, the PM measures how much your flywheel is slowing down to determine how sleek or slow your “boat” is. This rate of deceleration is called the drag factor. On your next stroke, the PM uses the drag factor to determine from the speed of the flywheel how much work you are doing. In this way, your true effort is calculated regardless of damper setting. This self-calibration is what allows us to compare scores from different indoor rowers, making things like indoor racing and the online world rankings possible.

Different indoor rowers can have different drag factor ranges. A damper setting of 3 on your home machine may feel like 4 on the machine at the gym. Differences in air temperature, elevation—even how much lint is caught in the flywheel housing—can all affect the drag factor from machine to machine. When using different machines, you may need to adjust the damper setting to achieve the drag factor and feel you prefer. See How to View Drag Factor for information on checking the drag factor on your machine.

What Damper Setting to Use

With a little experimentation, you will find the damper setting and drag factor that work best for you. We recommend starting out on a damper setting of 3–5. Really focus on technique, and as you improve, you may find that a lower damper setting gives you the best workout and results. Resist setting the damper lever too high; this can exhaust your muscles before you reap the full cardiovascular benefit rowing provides. The Performance Monitor will give you immediate feedback on each stroke so that you can monitor your performance and determine where you get your best results.

You can also vary your damper setting to achieve different types of workouts. In general, lower damper settings are best for aerobic workouts, while higher damper settings make rowing more of a strength workout.

More on Damper Settings and Drag:
Debunking Myths: Damper Setting, Stroke Rate and Intensity
Damper Settings of Olympians

Getting Comfortable on the Indoor Rower

In rowing, the body has three contact points with the rowing machine or boat: the hands, feet, and butt. Over time, these points can become uncomfortable. Fortunately, a little intervention—and patience!—goes a long way toward mitigating discomfort.

The Hands

Hands on Indoor Rower HandleIt’s no surprise that hands can take quite a beating from rowing. Blisters generally develop first, followed by calluses. The good news is that calluses offer protection: once your hands are callused, they should bother you less than when you first started. Even with calluses, be careful about suddenly increasing the duration of your rows—especially in hot or wet conditions, which accelerate blister formation. The key is to increase your rowing time gradually. Also, avoid letting your calluses get too thick. Clip or sand the top layer of dead skin when necessary.

Gloves or No Gloves?

Wearing gloves while rowing is a personal choice. Customers who prefer gloves tell us that weightlifting gloves work well.

The Feet

Feet on Indoor Rower Footstretchers
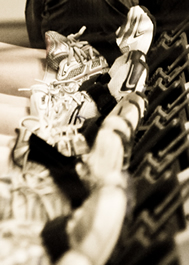
Of the three points of contact, the feet may have it the easiest—no gripping, no body weight, no impact. But, for ultimate comfort, it is important to find the right combination of socks and shoes. Choose good socks and shoes that aren’t too wide at the heel or have a heel with too much rise. (Wide heels can affect how well a shoe fits in the heel cup on the indoor rower, and shoes that rise too high may irritate your Achilles tendon at the finish of the stroke.)

Shoes or No Shoes?

Like gloves, rowing with or without shoes is a personal choice. If you prefer to row without shoes, you may want to try a thicker sock that has some grip. If you need some padding behind your heels, try a piece of foam, bubble wrap or some rags wrapped around the base of the footstretcher.

For more on rowing with shoes, check out our blog post on Shoe Choice.

Setting the Flexfoot

Strapping your feet into the machine in the right spot affects foot and seat comfort. In general, your heel should be positioned in the footstretcher so that the strap crosses over the ball of your foot. If you row without shoes, you may want to adjust your feet higher; if you are less flexible or are carrying extra weight around your midsection, you may want to adjust your feet lower. Make sure you don’t place your feet so low that your hamstrings rest uncomfortably against the seat, cutting off circulation to the butt.
For more on the topic, check out our blog post: A Foot Position Primer.

The Butt

Sitting on Indoor Rower Seat
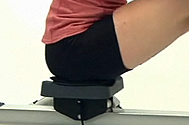
The butt has a lot to do during rowing. It supports your body weight, serves as a pivot point, participates in the rowing stroke itself, and gets sat on the whole time. If your butt is not happy while you’re rowing, chances are the rest of you isn’t happy either.

What type of seat people like or dislike is as varied as the body part in question. The best thing to do is experiment. If you need extra padding, try a folded towel or a piece of bubble wrap. You could also try our seat pad or rowing shorts, which provide padding in a slightly different location than cycling shorts. If you’ve tried extra padding and your butt is going numb during your rows, try less padding: too much can cause cramping and numbness. If your tailbone is really taking a beating, make sure the seat is on the monorail correctly: the depression should be at the rear of the seat to accommodate the tailbone.

Breathing Techniques

Creating a breathing rhythm can really help your rowing workouts. Ideally, the rhythm of your breath will relate to the rhythm of your stroke.

When rowing at lower intensities, many rowers take one breath per stroke. They add a second, shorter breath as they start rowing harder. The optimal point of when to switch from one to two breaths per stroke is highly personal; experiment to see what works best for you.

Consider Your Stroke Cadence

It’s helpful to coordinate the timing of your breathing with the phases of the stroke. Specifically:

  • During low intensity rowing (one breath)—Exhale gradually on the drive, expelling all remaining air at the finish. Inhale on the recovery.
  • During high intensity rowing (two breaths)—Exhale as you finish the drive. During the recovery, inhale, then exhale quickly. Inhale again just before the catch.

Create a Pattern

The most important consideration is to create a breathing pattern and stick with it throughout your row. This supplies regular oxygen to your muscles so they can function optimally, and it can also help you increase the intensity of your workout…especially on those days when you are less motivated to put in a hard effort.

Man Rowing

Stretching

Stretching before and after workouts may prevent injury and can make the difference between having a mediocre workout and a stellar one. Keep the following tips in mind:

  • Before you stretch, warm up by rowing lightly for 3–5 minutes.
  • While stretching, relax and be patient. Take deep, full breaths to maximize results.
  • Keep your stretches static: NO bouncing or abrupt movements.
  • Optimally complete 3–5 reps of each stretch.
  • Hold pre-workout stretches for about 10 seconds.
  • Hold post-workout stretches for up to 30 seconds.

Key Stretches

Legs

Bridge Stretch

Push into a bridge with straight legs and arms. Stretch one leg at a time.

Lower Back, Glutes, and Legs
Squat Stretch

Squat and try to get both heels on the floor.

Hamstring/Glute Hamstring and Glute Stretch

Lying on your back, bend one knee up to your chest and hug it. Then, extend your leg toward the ceiling and gently pull it to you. Repeat with the other leg.

Triceps

Behind the Head Tricep Stretch

Put one arm behind your head as shown. Grab your elbow with your other hand and pull gently. Repeat on the other side.

Calf and Achilles

Calf and Achilles Stretch

Stand about three feet from a wall with your hands resting on the wall.
Alternating feet, place each foot as far back as you can while keeping your heel flat on the floor. No bouncing and don’t overdo it; the goal is to gently stretch your calf.

Standing Hamstring Stretch Standing Hamstring Stretch

Place your leg on a chair or bench and straighten it. Keeping your back straight, lean forward until you feel the stretch in your hamstring. To increase the stretch, use a higher chair/bench. Repeat on the other side.

Lying Hamstring Stretch Lying Hamstring Stretch

Lie on your back. One leg at a time, bend your knee, then extend your leg toward the ceiling. Grasp your leg and gently pull it toward you. To ease strain on your lower back, bend the leg you are not stretching, placing your foot flat on the floor.

Variation: If it is difficult for you to grasp your leg with your hands, place a towel or strap around your leg and use that to gently pull your leg toward you.

Quadriceps

Quadricep Stretch

Standing arms-length from a wall, face the wall and place your left hand on it. Bend your right leg until you can grab your foot with your right hand. Gently pull your leg up against your glutes to stretch the top of your right thigh. Repeat on the other side.

Sitting Hamstring Stretch

Modified Hurdler Stretch

Sit on the floor with one leg out to the side and the other leg bent to the inside. Gently reach for your toes on the outstretched leg. Repeat on the other side.

Variation: Sit on the floor in the “hurdler’s position” (one leg out and one leg bent back) and reach to your toes with both arms. Repeat with the other leg.

Indoor Rowing Technique

Rowing is a natural motion and most people pick it up quickly with instruction and/or spending time focusing on technique. Have someone watch you row, comparing your body positions to those shown in the video below. Don't pull too hard until you are comfortable with the technique fundamentals.

The Rowing Stroke

How it works: The drive is the work portion of the stroke; the recovery is the rest portion that prepares you for the next drive. The body movements of the recovery are essentially the reverse of the drive. Blend these movements into a smooth continuum to create the rowing stroke.

The Catch

  • Arms are straight; head is neutral; shoulders are level and not hunched.
  • Upper body is leaning forward from the hips with the shoulders
    in front of the hips.
  • Shins are vertical, or as close to vertical as is comfortable for you. Shins should not move beyond perpendicular.
  • Heels may lift as needed.

The Drive

  • Start the drive by pressing with your legs, and then swing the back through the vertical position before finally adding the arm pull.
  • Hands move in a straight line to and from the flywheel.
  • Shoulders remain low and relaxed.

The Finish

  • Upper body is leaning back slightly, using good support from
    the core muscles.
  • Legs are extended and handle is held lightly below your ribs.
  • Shoulders should be low with wrists and grip relaxed. Wrists should be flat.

The Recovery

  • Extend your arms until they straighten before leaning from the hips towards the flywheel.
  • Once your hands have cleared your knees, allow your knees to bend and gradually slide the seat forward on the monorail.
  • For your next stroke, return to the catch position with shoulders relaxed and shins vertical.

Did you know? Your breathing rhythms can affect your workout. With a little practice, you can relate your breath to your stroke. For tips on how to breathe while rowing, visit our Breathing Techniques page for more.

Pages